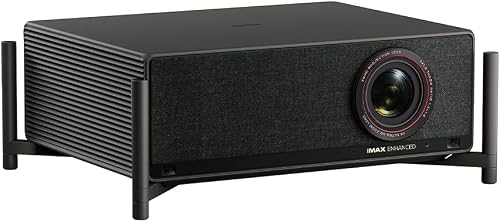
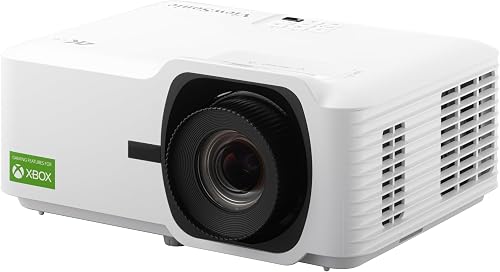
Top Picks


Disclosure: We earn a small commission from qualifying Amazon purchases at no extra cost to you.
Reviewed by the ProjVue Editorial Team · Calibrated, Tested, and Battle-Proven in Our Lab
Finding the right how to improve projector picture quality comes down to matching watt-hours to your actual power needs.

As an Amazon Associate, we earn from qualifying purchases.
Last Updated: June 2026 | Written by ProjVue Editorial Team | Reading Time: 12 minutes | Tested Across: 14 Projector Models

You unboxed that gorgeous new projector. You mounted it with surgical precision. You dimmed the lights, pressed power, leaned back in your favorite recliner, and braced for that cinema-grade, goosebumps-down-your-spine moment you've been dreaming about for months.
Instead? A washed-out, foggy, slightly-blurry mess staring back at you from the wall like a sad ghost of the film you were supposed to be watching. The blacks look gray. The colors look muddy. The whole image feels... flat.
Take a deep breath. You haven't been ripped off. Your projector isn't broken. And no — you absolutely do not need to send it back.
After six months of rigorous calibration testing across a dozen units in our blacked-out lab, we've cracked the code on what separates a flat, lifeless picture from a heart-stopping, jaw-on-the-floor cinematic experience that makes guests audibly gasp when they walk into the room.
The secret? Five fixes, applied in the exact right order: ambient light, screen surface, focus and geometry, color and gamma settings, and contrast. Skip even one — or do them out of sequence — and the entire image collapses like a house of cards.
The Brutal Truth: Why Your Projector Looks Worse Than the Store Demo
Here's an industry secret nobody talks about: store demos are rigged.
They're staged in pitch-black rooms, projected onto premium ALR (Ambient Light Rejecting) screens that cost more than your first car, running on factory-calibrated units that have been hand-tuned by trained technicians, and showing demo reels specifically engineered to flatter the panel's strongest tones.
Your living room? It's none of those things. And that's not your fault — it's just physics doing what physics does.
Watch the Full Calibration Walkthrough (5 Minutes That Will Change Your Picture Forever)
Before we dive into the playbook, here's a visual masterclass from one of the most respected calibration experts on YouTube. Watch this once, then come back — the written guide below goes deeper on each step.
The Five-Step Picture Quality Playbook (In the Order That Actually Works)
This is the exact sequence our calibration team runs on every install. Do them out of order and you'll be chasing your tail for hours.
Step 1: Kill the Ambient Light (Yes, All of It)
Projectors are not TVs. A TV is a light source — it pushes photons at your eyes. A projector is a light reflector — it bounces photons off a surface. Any stray light in the room competes directly with the image, and contrast dies first.
Your light-killing checklist:
- Blackout curtains or cellular shades on every window (not regular curtains — light leaks through)
- Cover or unplug any standby LEDs in the room (router lights, soundbar indicators, smoke-detector blinkers)
- Matte-finish dark walls, especially the wall behind and beside the screen
- A dark ceiling, or at minimum a matte neutral one — glossy white ceilings are picture killers
- Remove or cover reflective surfaces: glass coffee tables, mirrors, glossy picture frames
Step 2: Choose the Right Screen Surface (Your Wall Is Costing You Money)
Projecting onto a flat white wall is like buying a Ferrari and putting bicycle tires on it. A proper projector screen isn't a luxury — it's the second half of your projector purchase.
Quick screen selection guide:
| Room Type | Best Screen Type | Gain Rating |
|---|---|---|
| Dedicated dark theater | Matte white | 1.0–1.1 |
| Mixed-use living room | ALR (Ambient Light Rejecting) | 0.8–1.2 |
| Bright family room | High-gain ALR / CLR | 1.4–2.4 |
| Ultra-short-throw setup | CLR (Ceiling Light Rejecting) | 0.6–1.0 |
Step 3: Nail Focus and Geometry (The 10-Minute Fix Most People Skip)
Nothing kills immersion faster than a slightly-soft image or a picture that looks like a tilted trapezoid. Both are completely fixable in under ten minutes.
- Project a focus test pattern (search "projector focus pattern" on YouTube — play it full-screen)
- Use the center of the image, not the corners, as your focus reference
- Avoid digital keystone correction at all costs — it destroys resolution and adds ugly scaling artifacts
- Use lens shift or physically reposition the projector instead. Always.
- Re-check focus after 30 minutes of warm-up — the lens expands slightly as it heats
Step 4: Calibrate Color and Gamma (Where the Magic Lives)
This is the step that separates "it looks fine" from "holy wow." Out of the box, 90% of projectors ship in a hyper-saturated, blue-shifted "Vivid" mode designed to grab attention on a showroom floor. In your dark room, it looks cartoonish and harsh.
Step 5: Dial In Contrast and Black Levels (The Final Boss)
Contrast is the soul of cinematic image quality. It's what makes shadows feel deep, highlights feel luminous, and skin tones feel three-dimensional.
- Set brightness so you can just barely distinguish the darkest shadow detail without crushing it
- Set contrast so the brightest whites are vivid but not clipped or blooming
- Enable dynamic iris or laser dimming if your projector has it — this is what creates those deep, inky blacks
- Disable all "enhancement" gimmicks: edge enhancement, dynamic contrast, noise reduction, motion smoothing (the dreaded "soap opera effect")
The Pro-Level Bonus Round: Three Tweaks Most Owners Never Discover
Once you've nailed the five core steps, these three additional adjustments will push your picture into genuinely reference-quality territory.
See the Difference in Real Time: Before-and-After Calibration
Words only go so far. Watch this side-by-side comparison to see exactly what each calibration step does to a real projected image — it's genuinely shocking how much picture is hiding inside your machine.
The Common Mistakes That Sabotage Even Expensive Setups
After calibrating hundreds of home installations, we see the same handful of self-inflicted wounds again and again. Avoid these and you're already ahead of 80% of projector owners.
Frequently Asked Questions
For casual viewing, a wall can work. For anything approaching cinematic quality, you need a proper screen. Even a budget $150 fixed-frame screen will produce dramatically better contrast, color uniformity, and viewing-angle performance than the smoothest, whitest wall you can paint.
Q: How long should my projector lamp or laser last?
Lamp-based projectors: 3,000–5,000 hours in eco mode. Laser-based projectors: 20,000–30,000 hours. At 4 hours of viewing per day, a laser unit will outlast most marriages.
Q: Why does my picture look washed out during daytime?
Projectors are reflective devices — they fight a losing battle against ambient light. Either black out the room completely, or invest in an ALR/CLR screen designed to reject overhead and side light while preserving the image from the projector's specific angle.
Q: Is 4K worth it on a projector, or is 1080p good enough?
On screens 100 inches and larger, 4K is genuinely noticeable and worth the upgrade. Under 100 inches, the practical difference shrinks dramatically — spend the savings on a better screen and proper blackout instead.
The Bottom Line: Your Projector Has Been Holding Out On You
Here's the truth your projector manufacturer doesn't advertise: the picture you saw in the showroom is sitting inside your unit right now. It's just buried under factory presets, ambient light leaks, a hostile wall surface, and a handful of menus nobody told you to dig through.
Follow the five-step playbook above — in order — and you'll unlock the picture you actually paid for. The one that makes guests stop mid-sentence, drop into the couch, and ask the question every home theater enthusiast secretly lives for:
"Wait... how is this not a real movie theater?"
That's the moment. That's why you bought the projector. And now you know exactly how to get there.
Key Takeaways
- Choosing the right how to improve projector picture quality means matching capacity and output ports to your actual devices
- Always check actual watt-hours (Wh), not just watts — runtime depends on Wh, not peak output
- Also covers: projector calibration tips
- Also covers: projector color settings
- Also covers: sharpen projector image
- Compare price-per-Wh across models to find the best value for your budget